
Gifts Arrive via UPS
Let’s Get Your Holiday Shop Set Up!
Your gifts typically arrive 5–10 days before your sale, unless otherwise noted on your agreement.
Setting up is easy! Follow these five simple steps to get your Holiday Shop ready for the children.
Step 1: Organize Your Boxes
Start by sorting your boxes in numerical order: Box 1, Box 2, Box 3, and so on.
Have more than one Box 1? That’s normal!
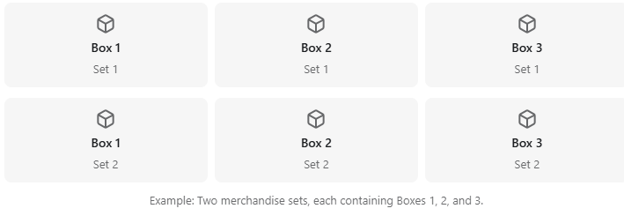
Larger schools may receive multiple sets of merchandise. Each set begins with Box 1 and continues with Box 2, Box 3, etc.
For example, if you receive three sets, you may have three Box 1s, three Box 2s, and three Box 3s.
Simply group boxes with the same number together. This will make unpacking and organizing your merchandise much easier.
Step 2: Open This Box First!
Look for the Box 1 marked “Open This Box First.”
Inside this specially marked box, you’ll find:
- Chairperson Packet: Important instructions and forms for running your sale.
- Pre-Priced Tent Cards: Pictures and prices to help organize and display your gifts.
- Prepaid UPS Return Labels: For returning unsold merchandise and supplies after your sale.
Important: Every Box 1 contains tablecloths and gift bags!
If you received multiple Box 1s, open all of them to collect your tablecloths and gift bags before setting up.
Remember to save your original shipping boxes and prepaid UPS return labels. You’ll need them when your Holiday Shop ends.
Step 3: Set Up Your Tables
We recommend having at least four tables, or more if space allows.
Here’s a simple way to organize your shop:
- Women’s Gifts: Mom, Grandma, Aunt, and other special people.
- Men’s Gifts: Dad, Grandpa, Uncle, and others.
- Kids’ Gifts: Brothers, sisters, babies, pets, and friends.
- Checkout & Gift Bags: Position this area near the entrance or exit for easy checkout.
Cover your tables with the provided tablecloths.
Next, arrange the pre-priced tent cards by category, starting with the lowest prices and working your way up. This makes it easier for children to shop within their budgets.
Step 4: Unpack & Display Your Gifts
Now comes the fun part!
Each box includes a packing list with pictures of the gifts inside, making it easy to identify the merchandise.
As you unpack:
- Match each gift to its picture on the pre-priced tent card.
- Place the gifts on the appropriate tables.
- Display enough merchandise to start your sale.
- Keep extra inventory in the original boxes under or behind your tables for easy restocking.
Tip: Assign one volunteer to each gift category to help unpack and organize the merchandise.
Every box also has a packing list on the outside, making it easy to find additional gifts when you need to restock.
Damaged Gifts: If you find damaged merchandise, report it under Missing & Damaged in the Cash Register App or Chairperson Portal. Set damaged gifts aside and discard them rather than returning them with your unsold merchandise.
Remember: With our No Count program, there’s no need to count every gift as you unpack, just track your cash sales!
Step 5: Make It Festive!
A little holiday spirit goes a long way!
Play holiday music, add a few decorations, and encourage volunteers to wear festive outfits.
Creating a cheerful atmosphere makes shopping even more exciting for the children!
You’re Ready for Opening Day!
With your gifts displayed, checkout area prepared, and extra inventory organized, your Holiday Shop is almost ready.
We recommend having your volunteers download the Cash Register App and practice checkout before the first class arrives.
Now you’re ready to help children discover the joy of giving!